If you’ve ever worked on a multi-story project in Revit, you’ve likely faced the frustration of modeling complex elements. Spiral stairs, in particular, can be a significant pain point. You follow the tutorials, use the dedicated tool, and end up with something that looks… well, not quite right. It feels clunky, inefficient, and fundamentally different from the sleek, overlapping stairs you see in real-world architectural projects.
The problem isn’t your modeling skill; it’s the tool itself. The core, surprising premise is that Revit’s built-in “Full Step Spiral” tool is fundamentally flawed because it doesn’t model stairs the way they are actually built. It creates a simplified version that misses the most critical detail of a compact spiral design: overlapping treads.
This article will reveal a counter-intuitive but “correct” method for creating realistic, buildable spiral stairs in Revit. It involves abandoning the Stair tool entirely and using a completely different set of components to achieve a far superior result.
Watch this video where I show how to do it RIGHT!
——————————————————————————–
1. The Big Problem: Revit’s Default Spiral Stairs Don’t Overlap
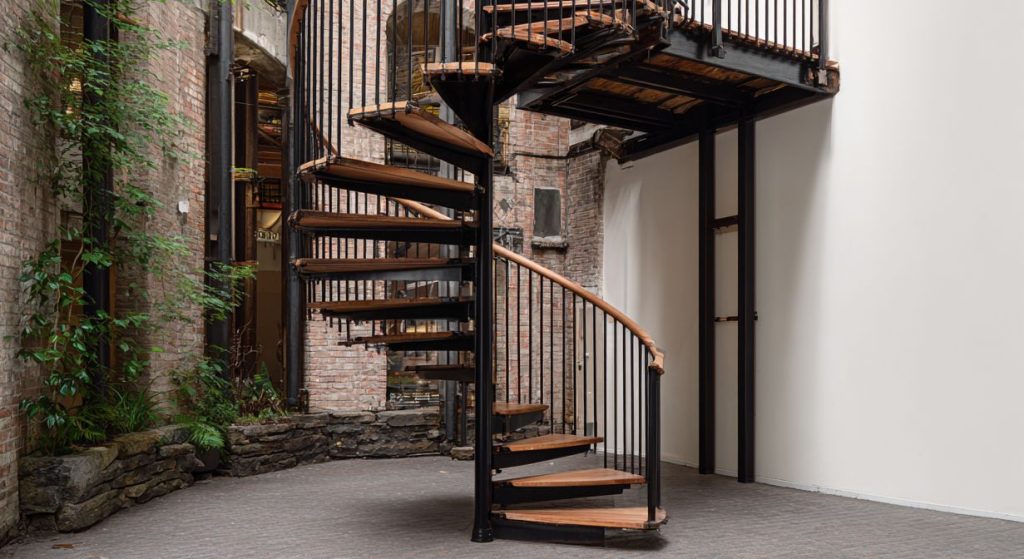
The fundamental flaw with Revit’s default “Full Step Spiral” tool is simple: each step begins only where the previous one ends, with absolutely no overlap. This creates a stair that is unnecessarily spread out and doesn’t reflect the space-saving nature of a true spiral staircase.
Real-world spiral stairs, especially those designed for tight spaces, must have overlapping treads. This design is what makes them so efficient, allowing for a comfortable ascent while minimizing the overall footprint and providing adequate headroom. Without this overlap, the stair is not only unrealistic but also impractical.
——————————————————————————–
2. The Counter-Intuitive Solution: Build a Railing, Not a Stair
The solution is radical: to build a proper spiral stair, you must completely abandon the Stair tool. The “correct” method uses the Railing tool as the foundation for the entire assembly.
——————————————————————————–
3. The Clever Hack: Each Stair Step is Actually a Baluster
With the sloped railing path created, the next part of the technique is even more unconventional. The individual stair treads are not stair components at all; they are modeled as a custom “Baluster” family.
——————————————————————————–
4. The Final Touch: Use Simple Math for Perfect Spacing
The final piece of the puzzle is getting the spacing between the steps perfectly even, which is critical for a professional and accurate result. This requires a quick, simple calculation performed outside of Revit.
The method involves finding the total length of the spiral path (the helix).